
Moving the blog
Well, it was never going to last forever. I have abandoned this blog. The content has been migrated over to my new blog, and new posts are being added there. Move along, nothing to see here...posted at: 00:00 | path: /life | permanent link to this entry
13 Dec 2016QEMU USB host device pass-through
Speeding up UEFI driver development
While working on the ChaosKey UEFI driver, I once again found myself in a situation of tedium: how to simplify driver development when the target for my device driver is firmware. Moving around a USB key with a FAT filesystem may be a completely valid thing to do in order to install a pre-existing driver. But when you are trying to learn how to write drivers for a new platform (and write blog posts about it), the modify -> compile -> copy -> reboot -> load -> fail -> try again cycle gets quite tedious. As usual, QEMU has/is the answer, letting you pass a USB device controlled by the host over to the guest.Make sure your QEMU is built with libusb support
Unsurprisingly, in order to support passing through USB device access to guests, QEMU needs to know how to deal with USB - and it does this using libusb. Most Linux distributions package a version of QEMU with libusb support enabled, but if you are building your own version from source, make sure the output from configure containslibusb yesIf it does not, under Debian,
$ sudo apt-get build-dep qemu should do the trick - anywhere else make sure you manually install libusb v1.0 or later (Debian's libusb-dev package is v0.1, which will not work), with development headers.
Without libusb support, you'll get the error message 'usb-host' is not a valid device model name when following the below instructions.
Identifying your device
Once your QEMU is ready, in order to pass a device through to a guest, you must first locate it on the host.$ lsusb ... Bus 008 Device 002: ID 1d50:60c6 OpenMoko, Inc Bus 008 Device 001: ID 1d6b:0002 Linux Foundation 2.0 root hub ....The vendor ID (1d50) of ChaosKey is taken from the OpenMoko project, which has repurposed their otherwise unused device registry space for various community/homebrew devices. If you want to be able to access the device as non-root, ensure the device node under
/dev/bus/usb/<bus>/<device>(in this case
/dev/bus/usb/008/002) has suitable read-write access for your user.
Launching QEMU
Unlike the x86 default "pc" machine, QEMU has no default machine type for ARM. The "generic virtualized platform" type virt has no USB attached by default, so we need to manually add one.ich-usb-uhci1 supports high-speed, and so is needed for some devices to work under emulation. Using the "virtual FAT" support in QEMU is the easiest way to get a driver into UEFI without recompiling. The example below uses a subdirectory called fatdir which QEMU generates an emulated FAT filesystem from.
USB_HOST_BUS=8
USB_HOST_PORT=2
AARCH64_OPTS="-pflash QEMU_EFI.fd -cpu cortex-a57 -M virt -usb -device ich9-usb-uhci1"
X86_OPTS="-pflash OVMF.fd -usb"
COMMON_OPTS="-device usb-host,bus=usb-bus.0,hostbus=$USB_HOST_BUS,hostport=$USB_HOST_PORT -nographic -net none -hda fat:fatdir/"
This can then be executed as
$ qemu-system-x86_64 $X86_OPTS $COMMON_OPTSor
$ qemu-system-aarch64 $AARCH64_OPTS $COMMON_OPTSrespectively.
Note: Ordering of some of the above options is important.
Note2: That AARCH64
QEMU_EFI.fd needs to be extended to 64MB in order for QEMU to be happy with it. See this older post for an example.
My usage then looks like the following, after having been dropped into the UEFI shell, with a bunch of overly verbose debug messages in my last compiled version of the driver:
Shell> load fs0:\ChaosKeyDxe.efi
*** Installed ChaosKey driver! ***
Image 'FS0:\ChaosKeyDxe.efi' loaded at 47539000 - Success
Shell> y (0x1D50:0x60C6) is my homeboy!
1 supported languages
0: 0409
Manufacturer: altusmetrum.org
Product: ChaosKey-hw-1.0-sw-1.6.6
Serial: 001c00325346430b20333632
And, yes, those last three lines are actually read from the USB device connected to host QEMU is running on.
Final comments
One thing that is unsurprising, but very cool and useful, is that this works well cross-architecture. So you can test that your drivers are truly portable by building (and testing) them for AARCH64, EBC and X64 without having to move around between physical machines. Oh, and another useful command in this cycle isreset -s in the UEFI shell, which "powers down" the machine and exits QEMU.
posted at: 18:09 | path: /uefi | permanent link to this entry
13 Sep 2016UEFI Driver Development - Part 1
One of the key features of UEFI is that the specification and the APIs/ABIs it guarantees provides the ability to produce portable applications, drivers and libraries (in the form of protocols). On the simpler side, by letting you compile the driver once for each architecture - and on the more space age side by letting you build a single driver that works across all architectures (using EFI Byte Code). The extra magic comes in the form of Option ROM support, which lets plug-in PCI cards keep a driver onboard, informing UEFI to load it on boot. (Any jokes about Forth drivers for Open Firmware go here.) So, having never actually written a UEFI driver from scratch, and most of the drivers I have come across having really been platform drivers, I figured that would be a good start to write a standalone driver from scratch. And the outcome is this slightly hands-on blog post series. This part covers:- creating a new driver from scratch
- building it as a standalone driver
- loading it from the UEFI Shell
- having it detect the presence of a device it recognizes
- unloading it from the UEFI Shell
Creating a standalone UEFI driver from scratch
Since UEFI drivers are meant to be standalone buildable, they tend to be kept in separate directories. Since this driver is intended to run during/after DXE phase, let's put everything in a directory called ChaosKeyDxe (CamelCase mandatory - link takes you to the directory in git, where you can view the files directly).Create a build information file
First of all, we need a build information file (.inf). The format of the build information file is described in the EDK II INF File Spec, which can be found in the EDK2 github pages. Start with a [Defines] section[Defines] INF_VERSION = 0x00010019 BASE_NAME = ChaosKeyDxe FILE_GUID = 9A54122B-F5E4-40D8-AE61-A71E406ED449 MODULE_TYPE = UEFI_DRIVER VERSION_STRING = 1.0 ENTRY_POINT = ChaosKeyEntryPoint UNLOAD_IMAGE = ChaosKeyUnloadThe INF_VERSION reflects which version of the INF file format is being followed, in this case 1.25 (
0x0001.0x0019). Interestingly, nearly all build information files I have come across before specify 0x00010005 ... cargo culting from earlier examples.Followed by BASE_NAME, the single word identifier used for this component. To keep things simple, I'm reusing the directory name, for the same reasons.
And then a FILE_GUID, generated uniquely for this file - for example through this online generator, ensuring Uppcase and Hyphens are both ticked. If this string is copied from an existing template rather than uniquely generated, really bad stuff will happen.
And then MODULE_TYPE to tell the build system we are producing a UEFI_DRIVER.
A VERSION_STRING is also required - this is simply a UCS2 string indicating the version of the driver.
The ENTRY_POINT function is automatically called at driver load time, and needs to contain code that registers the driver with the system, and do any other global setup needed to make the driver ready to set up individual devices.
UNLOAD_IMAGE points to the function cleaning up after the driver when it is to be unloaded. This is not really mandatory for a driver expected to be used for booting the system (it will be discarded by the operating system anyway, unless it takes specific actions to keep bits resident), but it comes in very handy for development. The build information file usually includes a (commentary only) stanza stating which architectures the executable is expected to work on.
#
#  VALID_ARCHITECTURES           = AARCH64 ARM EBC IA32 IPF X64
#
The remainder of the file simply specifies which source files are used to build the driver, which declaration files it uses (
MdePkg/MdePkg.dec), which library classes it needs (resolved into specific libraries by the build description file) and which protocols it consumes.
[Sources]
  ChaosKeyDriver.h
  DriverBinding.c

[Packages]
  MdePkg/MdePkg.dec

[LibraryClasses]
  UefiBootServicesTableLib
  UefiDriverEntryPoint
  UefiLib

[Protocols]
  gEfiUsbIoProtocolGuid
Adding some actual code
Since we are not yet implementing any actual functionality beyond discovery, the only C source file added at this point isDriverBinding.c. This all comes down to implementing an instance of EFI_DRIVER_BINDING_PROTOCOL. Let us go through that, function by function.
EntryPoint
All the entry point function does is register the protocol instance, as defined in thegUsbDriverBinding struct, with the system - and return EFI_SUCCESS, printing an informational message as it does so. The gUsbDriverBinding struct contains pointers to the Supported(), Start() and Stop() functions defined by the protocol, as well as a Version number which lets UEFI pick the most up to date driver if multiple are available.
Supported
When a new device is detected in the system, UEFI will ask all of the plausible drivers whether they know how to deal with it, by calling theirSupported() function. This implementation is probably one of the few bits of this driver that is pretty much feature complete - all it really needs to do is to find the USB manufacturer/device IDs and see if they are ones the driver knows how to handle. It then returns EFI_UNSUPPORTED if this is a device it does not support, or EFI_SUCCESS if it is a device it supports.
Start/Stop
Start() and Stop() are left empty for now, returning EFI_UNSUPPORTED whenever they are called. This is something that will be filled in in part 2 of this series.
UnloadImage
Finally, when (if!) we unload the driver,UnloadImage() ensures that the bits that were registered by EntryPoint() are unregistered again.
Building and using the driver
Building the standalone driver
In order to build a standalone driver, you need a platform description (.dsc) file, mapping your library dependencies to actually available libraries. One way of doing this is to implement your own complete .dsc. However, this is exactly what EDK2's OptionRomPkg/OptionRomPkg.dsc provides. So a simpler way can be to simply add the .inf to the [Components] section of OptionRomPkg.dsc. After that, the build should be as easy as:
GCC5_AARCH64_PREFIX=aarch64-linux-gnu- build -a AARCH64 -t GCC5 -p OptionRomPkg/OptionRomPkg.dsc -m OpenPlatformPkg/Drivers/Usb/Misc/ChaosKeyDxe/ChaosKeyDxe.inf
Loading the driver
For this example (and because Juno's built-in magical program-over-USB filesystem is insane), let's load the driver from a USB key. For simplicity's sake, have it plugged in when powering on and drop into the UEFI Shell. In my case, the USB key ended up as filesystemFS2:.
Shell> FS2:
FS2:\> load ChaosKeyDxe.efi
add-symbol-file /home/leif/work/git/edk2/Build/OptionRomPkg/DEBUG_GCC5/AARCH64/OpenPlatformPkg/Drivers/Usb/Misc/ChaosKeyDxe/ChaosKeyDxe/DEBUG/ChaosKeyDxe.dll 0xF85E4000
Loading driver at 0x000F85E3000 EntryPoint=0x000F85E4044 ChaosKeyDxe.efi
*** Installed ChaosKey driver! ***
Image 'FS2:\ChaosKeyDxe.efi' loaded at F85E3000 - Success
FS2:\>
At this point, you can verify that the driver has loaded by invoking the
drivers command:
FS2:\> drivers
             T   D
             Y C I
             P F A
DRV VERSION  E G G #D  #C  DRIVER NAME                         IMAGE PATH
=== ======== = = = === === =================================== ==========
 23 00000030 D N N   1   0                        Fv(B73FE497-B92E-416E-8326-45AD0D270092)/FvFile(1DF18DA0-A18B-11DF-8C3A-0002A5D5C51B)
...
 6F 0000000A D N N   1   0                        Fv(B73FE497-B92E-416E-8326-45AD0D270092)/FvFile(4579B72D-7EC4-4DD4-8486-083C86B182A7)
 9E 0000000A ? N N   0   0                        FS2:\ChaosKeyDxe.efi
You can see how the driver is loaded, and has the driver handle number 9E.
Now, plug in the ChaosKey:
FS2:\> ChaosKey (0x1D50:0x60C6) is my homeboy!
UsbSelectConfig: failed to connect driver Not Found, ignored
We can see how the
Supported() function is invoked, and we then see an error message. The error is triggered by our empty Start() function returning EFI_UNSUPPORTED when UEFI attempts to bring the device online. We'll fix that bit in part 2 of the series.
Unloading the driver
During development, it can be handy to be able to load/unload without a full reboot. To do so, just callunload with the driver handle you got from the drivers command. Add the -v option to get some extra output.
FS2:\> unload -v 9E
     Revision......: 0x00001000
     ParentHandle..: FD317918
     SystemTable...: FDF30018
     DeviceHandle..: FD243918
     FilePath......: FC98FF98
     OptionsSize...: 0
     LoadOptions...:
     ImageBase.....: F85E3000
     ImageSize.....: 8000
     CodeType......: EfiBootServicesCode
     DataType......: EfiBootServicesData
     Unload........: F85E4000
Unload - Handle [FC990598].  [y/n]?
y
remove-symbol-file /home/leif/work/git/edk2/Build/OptionRomPkg/DEBUG_GCC5/AARCH64/OpenPlatformPkg/Drivers/Usb/Misc/ChaosKeyDxe/ChaosKeyDxe/DEBUG/ChaosKeyDxe.dll 0xF85E4000
Unload - Handle [FC990598] Result Success.
FS2:\>
You can also verify the unload was successful by running drivers again, and seeing this driver no longer listed.
posted at: 22:02 | path: /uefi | permanent link to this entry
22 Jun 2016Opening up UEFI platform support
As some of you may know, one of the main points I have been pushing for over the past couple of years has been the availability of reference code for real platforms. Given that historically, firmware source code has simply not been available for UEFI-based computers, resolving this has been no trivial exercise. I gave an outline presentation about this at the UEFI spring plugfest in Seattle last year, announcing that I was starting a work-in-progress tree called OpenPlatformPkg (due to lack of imagination) where I was going to start staging support for multiple platforms/devices. I created this as a separate tree holding only the platform code. As a way to keep things clean, and if I am to be honest also because this enforces deeper consideration of changes to core code. (I'm not suggesting this is the way it should be done when moving platform support into Tianocore, just that it removed several potential conflict points when interacting with organisations not used to working against a single source tree for multiple platforms.) Since then, the most visible impact of this in the EDK2 source tree has been the removal of platform code from EDK2, as I moved it into OpenPlatformPkg. I finally started to see contributions outside of the ARM ltd. platforms a couple of months ago, and have since struggled to keep up with reviewing the patches contributed: Over the past few weeks, I have merged support for:-
Hisilicon D02 and D03 platforms
AMD Overdrive (Seattle development platform)
LeMaker Cello (Seattle-based 96boards EE)
AMD
We have been working with AMD over the past few months to provide a port based on the official Seattle Firmware Development Kit (FDK) - the same that is used for the commercial firmware shipped on AMD Overdrive and Softiron 3000 platforms. Since this was never originally designed to be used in an open source context, it has included the relicensing of header files and some restructuring to permit simple rebuilding of the binary modules for new FDK releases. So this new port comes with some blobs - BUT it does bring source code for ACPI, SMBIOS, (non-PCIe) SATA controller, Hardware RNG and overall platform initialization. And of course it reuses some existing open source drivers available in EDK2. From a personal perspective, this means I can now with a quick turnaround test new EDK2 core changes on my Overdrive. This being a platform with all of its RAM > 4GB, it has also helped flush out some incorrect assumptions in core EDK2 code (and a Linux driver or two).Hisilicon
We actually got most of the way towards a port for the D02 platform back in December - enough for me to agree to post it as a public branch on the main OpenPlatformPkg repository. But I still had a fair amount of things I wanted improved style wise, and the Hisilicon engineers were under pressure to provide a port for the newer D03 platform as well, so spent a few months getting this up and running. But contrary to the story we have seen many times (with many different vendors) in the mobile space, once they completed this they came back. and put a big effort responding to review feedback to ensure both platforms could be merged simultaneously during our reference platform sprint in Cambridge (UK) last week.Future
Well, Tianocore has now obtained a more standardised (and public) change process, and there is currently a proposal underway for how to support platforms in official repositories: http://thread.gmane.org/gmane.comp.bios.edk2.devel/11624 With a bit of luck and some hard work OpenPlatformPkg can become redundant the year after it was introduced! I have also had a few more contacts from people looking to provide ports for upcoming (and existing) platforms, so there should be some more to show later in the year.posted at: 16:54 | path: /uefi | permanent link to this entry
25 Jul 2015posted at: 00:57 | path: /drafts | permanent link to this entry
03 Feb 2015Foundation model with ARM trusted firmware and UEFI
So, as I wrote in Foundation Model - a line in the sand?, a lot of things have changed in the underlying platform for the ARM Foundation Model for ARMv8. So I thought I would describe how to set one up ... on the right side of the line.Installing the model
First of all, you need to download the ARMv8 Foundation Platform - which requires registering for an account on the ARM download portal. Extract the archive to a suitable location.Building UEFI
The recent versions of Foundation Model are actually software compatible with the FVP Base model. The "Foundation_v8" image does not work on these, and since Linaro 2014.09, we have renamed that platform "foundation_legacy". Secondly, the "fvp" UEFI build (like the Juno one) now expects to be loaded by ARM Trusted Firmware. So I've updated our build scripts to deal with this in a mostly automated fashion:uefi-build.sh has a new parameter -a to specify the location of an ARM Trusted Firmware checkout. It will then, based on configuration options in platforms.config, build UEFI, build ARM Trusted Firmware into a bl1.bin image, and then package the UEFI image with additional Trusted Firmware components into a fip.bin image.
Of course, you can also download our pre-built monthly release images, and skip the build instructions.
$ git clone git://git.linaro.org/uefi/uefi-tools.git
$ git clone https://github.com/ARM-software/arm-trusted-firmware.git
$ git clone git://git.linaro.org/uefi/linaro-edk2.git
$ cd linaro-edk2
$ ../uefi-tools/uefi-build.sh -a ../arm-trusted-firmware -b DEBUG fvp
Booting the system
Now grab thebl1.bin and fip.bin from Build/ArmVExpress-FVP-AArch64/DEBUG_GCC48/FV/ (or download them), and launch the foundation model.
$ Foundation_Platformpkg/models/Linux64_GCC-4.1/Foundation_Platform \
	--cores=2 \
	--gicv3 \
	--data=bl1.bin@0x0 \
	--data=fip.bin@0x08000000 \
	--block-device=disk.img
disk.img is an optional parameter for adding a virtio block device image file, to use as a local filesystem. For very basic UEFI, GRUB or Linux kernel testing, it can be omitted.
We specify that bl1.bin (the Trusted Firmware system startup code) and fip.bin are loaded into RAM at predefined locations. We also specify that we use the GICv3 variant of the modelled system, which affects the memory map. Currently the EDK2 code still puts this GIC into legacy mode, but without --gicv3 it will look for the interrupt controller registers in the wrong location. --cores=2 is not necessary, but makes the model emulate just 2 cores rather than the default 8 - which makes the model run faster while still letting you have fun with software concurrency.
posted at: 23:46 | path: /drafts | permanent link to this entry
27 Jan 2015Installing Debian Jessie on QEMU AArch64
I previously wrote about how to run AArch64 UEFI on QEMU, but it did not really cover how to do anything useful with it. So here is a follow-up, showing how you can install and run a full Debian installation. The steps below require at least version 2015.01 of linaro-edk2.Building QEMU
Full support for AArch64 (the 64-bit ARM architecture) was only added into QEMU version 2.2.0, so will probably not yet be in any distribution-provided QEMU. So for now, let's build our own:$ git clone git://git.qemu-project.org/qemu.git $ cd qemu $ git checkout -b 2.2.0-stable v2.2.0 $ ./configure --prefix=/usr/local --target-list=aarch64-softmmu $ make -j`getconf _NPROCESSORS_ONLN` $ sudo make install
Create ROM Images
The aarch64 virt machine sports two emulated 64MB NOR flash devices, holding the platform firmware and its persistent environment. We use the IntelBds flavour of the UEFI images, which is what the x86 Ovmf QEMU port does.$ mkdir ~/arm64-qemu && cd ~/arm64-qemu $ dd if=/dev/zero of=flash0.img bs=1M count=64 $ LINARO_EDK2_URL=http://releases.linaro.org/15.01/components/kernel/uefi-linaro/ $ wget $LINARO_EDK2_URL/release/qemu64-intelbds/QEMU_EFI.fd $ dd if=QEMU_EFI.fd of=flash0.img conv=notrunc $ dd if=/dev/zero of=flash1.img bs=1M count=64
Block devices
We need to prepare image files for the emulated HDD as well as the installation CDROM. The CDROM image, we just download - until Debian Jessie has actually been released, from the weekly snapshots. I would recommend the netinst iso, which is 150MB in size and grabs all packages from the network. If you need to do an installation somewhere with no networking, go for the 4.4GB single DVD image instead. For the HDD image, we just need to create an empty file of sufficient size to hold our system - I would say 8GB, but if you're doing something very limited you could get away with less.$ dd if=/dev/zero of=hda.img bs=1M count=8192
Creating a launch script
Since we do not yet have PCI emulation on AArch64 in QEMU (underway) or EDK2 (to be commenced in the next month or so), we cannot simply use -hda and -cdrom so find ourselves in "magic rune" territory. For now, the below script is a simple enough way to launch the emulator.#!/bin/sh
CDROM_IMG=debian-testing-arm64-netinst.iso
HDA_IMG=hda.img
make_cdrom_arg()
{
echo "-drive file=$1,id=cdrom,if=none,media=cdrom" \
"-device virtio-scsi-device -device scsi-cd,drive=cdrom"
}
make_hda_arg()
{
echo "-drive if=none,file=$1,id=hd0" \
"-device virtio-blk-device,drive=hd0"
}
HDA_ARGS=`make_hda_arg $HDA_IMG`
if [ $# -eq 1 ]; then
case $1 in
install)
CDROM_ARGS=`make_cdrom_arg $CDROM_IMG`
;;
*)
CDROM_ARGS=""
;;
esac
fi
qemu-system-aarch64 -m 1024 -cpu cortex-a57 -M virt -nographic \
-pflash flash0.img -pflash flash1.img \
$CDROM_ARGS $HDA_ARGS -netdev user,id=eth0 \
-device virtio-net-device,netdev=eth0
Launching the model
Save the above script aslaunch.sh, make it executable with chmod +x launch.sh and launch the emulator with ./launch.sh install. You should end up with something looking a bit like this in your terminal:
 From here on, you have a standard Debian installer, which I'm not going to help you with, since there are many other resources available (and the installer is generally quite straightforward).
posted at: 13:06 | path: /uefi | permanent link to this entry
29 Oct 2014Using Ovmf to test kernel SMBIOS support
qemu-system-x86_64 -m 1024 -smbios type=1,manufacturer=Leif,product=Smurf -hda sda.img -pflash pflash.imgposted at: 17:58 | path: /drafts | permanent link to this entry
26 Sep 2014UEFI for ARM/ARM64 on QEMU
One really useful thing that happened at Linaro Connect last week was that Ard Biesheuvel managed to complete the port of UEFI to arm and aarch64 QEMU. This has been a component missing for us to enable what is really the standard development environment for most Linux devs. Ard has documented this on the Linaro wiki, but I wanted to (a) put this into an rss feed and (b) have a static set of instructions. Also, I've added the platforms to the uefi-tools platform configuration to make building a bit less tedious.QEMU
Earlier this year, without the noisy announcement it deserved, we finally got AArch64 system support in QEMU. User mode emulation had been available for quite some time at that point, and had been really useful for the Linux distributions' bootstrapping efforts, but did not help the kernel and firmware developers. Anyway, the UEFI port depends on some changes that only went in last week, so for now we still need to build a fresh upstream:$ git clone git://git.qemu.org/qemu.git $ cd qemu $ ./configure --prefix=/usr/local --target-list=arm-softmmu,aarch64-softmmu $ make -j9 $ sudo make install
UEFI
The required patches to EDK2 are already upstream, so the only requirement is that you have a working cross compiler. I am using a Linaro 4.8 gcc prebuilt one.$ git clone git://git.linaro.org/uefi/uefi-tools.git $ git clone https://github.com/tianocore/edk2.git $ cd edk2 $ ../uefi-tools/uefi-build.sh -b DEBUG -b RELEASE qemu64The generated firmware image will be found as
Build/ArmVirtualizationQemu-AARCH64/{DEBUG,RELEASE}_GCC48/FV/QEMU_EFI.fd
To build the 32-bit variant:
$ ../uefi-tools/uefi-build.sh -b DEBUG -b RELEASE qemuThe generated firmware image will be found as
Build/ArmVirtualizationQemu-ARM/{DEBUG,RELEASE}_GCC48/FV/QEMU_EFI.fd
Prebuilt binaries
So, due to yours truly messing up, this support was not included in Linaro's 2014.09 release (the source code contains the support, but the pre-built images are missing). However. I kicked off a build just after and produced a debug and a release version.Setting up and running a system
You will want to generate data files to hold the emulated flash images for the UEFI firmware and UEFI's persistent environment variables:$ dd if=/dev/zero bs=1M count=64 of=flash0.img $ dd if=/dev/zero bs=1M count=64 of=flash1.img $ dd if=Build/ArmVirtualizationQemu-AARCH64/DEBUG_GCC48/FV/QEMU_EFI.fd \ bs=1M of=flash0.img conv=notruncAnd then launch the 64-bit model using:
$ qemu-system-aarch64 \
	-m 1024 \
	-cpu cortex-a57 \
	-M virt \
	-pflash flash0.img \
	-pflash flash1.img \
	-serial stdio
Or for the aarch32 variant:
$ qemu-system-arm \
	-m 1024 \
	-cpu cortex-a15 \
	-M virt \
	-pflash flash0.img \
	-pflash flash1.img \
	-serial stdio
posted at: 23:38 | path: /uefi | permanent link to this entry
14 Aug 2014A month off
One nice thing about working for ARM is that once every four years, you get four extra weeks of holiday in a year - called a sabbatical. Especially with the British scepticism with regards to longer normal holidays, this makes for a very welcome break. Last time I spent those weeks working in the garden, helping rig the Cambridge Beer Festival, attending the Cambridge Beer Festival and helping tear down the Cambridge Beer festival. Being in my 9th year of employment with ARM, I now have my second one coming up, and I'll be spending it with Maria in the US, traveling aound a bit. We will start out in San Francisco, before flying over to Denver, drive up to Estes Park (and stay there for just over a week), and then back down to Boulder. Then we commence the road trip: to Colorado National Monument, Zion National Park, Monument Valley, Durango (taking the narrow-gauge railway to Silverton), Las Cruces (New Mexico Chile Pepper Institute), Big Bend National Park, Fredericksburg and arriving in Austin where we hang around and meet up with various friends. Then flight back to SFO and straigt onto Linaro Connect.posted at: 22:33 | path: /drafts | permanent link to this entry
09 Aug 2014Foundation Model - a line in the sand?
When ARM announced its 64-bit architecture, this was eventually followed by a free (as in beer) software model of that architecture. This model is called the Foundation Model, and although somewhat of an unwanted stepchild next to the commercially available (read expensive) FVP Base model, it is periodically updated. Unfortunately, these updates are not just feature additions and bugfixes - there have also been substantial changes to the platform in the shape of memory map modifications and the introduction of GICv3 support. And finally, on the platform software side, both support for UEFI and ARM Trusted Firmware were added substantially later than the Foundation Model was released. And they have changed over time to accomodate the changes in the model. What this means is that it has not been possible to keep a stable development platform while also being able to update model versions and firmware. I think what is needed is to draw a line in the sand not too far back and make sure everyone developing on the Foundation Model use a minimum version of everything, and a standardised configuration. That is what I am trying to provide with this post. But aside from complaining, there has also been various software features added that in themselves motivate an upgrade in order to simplify doing the right thing.So, where is that line?
My suggestion is that the line is drawn as follows:| Component | Version | Reason |
|---|---|---|
| Foundation Model | 0.8.5206 | bugfixes, latest memory map |
| ARM Trusted Firmware | v0.4 | New-ish? |
| UEFI | Linaro-edk2 2014.06, or corresponding upstream | Fixes for making efibootmgr functional from within Linux. Linaro build includes a built-in DTB. |
| Linux Kernel | v3.16 | UEFI support available for arm64 in upstream kernel |
--gicv3, or UEFI will fail to boot properly. Also, the DTB provided with mainline Linux does not function at all with modern versions of the model. If you don't use a UEFI image that provides you with one, the only place you can find one is in the ARM Trusted Firmware tree, under 'fdts/'. fvp-foundation-gicv2-psci.dtb is a safe bet (since the GICv3 implementation is backwards compatible).
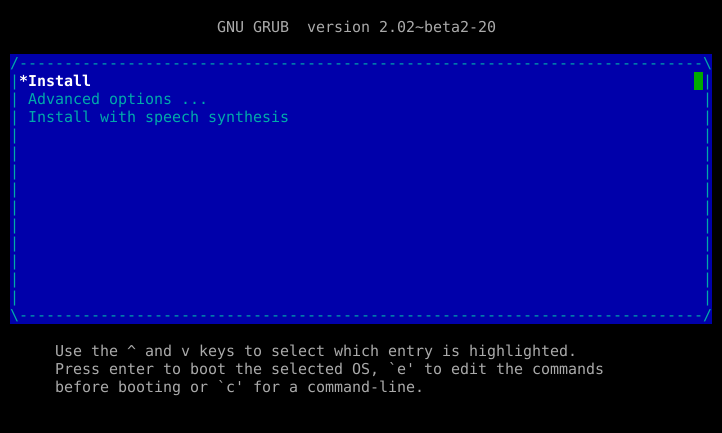
If you want to use GRUB, 2.02~beta2 contains full support for arm64 UEFI platforms.
posted at: 23:16 | path: /uefi | permanent link to this entry
08 Aug 2014BeagleBone Black booting
The TI Beagle development boards have a ... weird (software) boot architecture. All documentation I was able to find online for running Linux on them is based around a set of cryptic and very specific instructions to:
- create a small 16-bit FAT partition at the start of the (micro)SD card
- copy the x-loader (a file called MLO) to that FAT filesystem as the first file to be written to that filesystem after formatting
- hope for the best
Why do I care?
Apart from this feeling a bit ... cargo-cultish, it poses an actual problem if one wants to not use MBR partitioning on the device - since the ROM code loading this MLO only supports that partition table format. In my case, I wanted to use GPT partitioning.
Turns out there is actually a pretty easy way of doing this - only the information is not found in the Beagle docs, but in the SoC (Sitara 335x) Technical Reference Manual: In raw mode the booting image can be located at one of the four consecutive locations in the main area: offset 0x0 / 0x20000 (128KB) / 0x40000 (256KB) / 0x60000 (384KB).
This ends up quite sufficient for us, as the amount of partition table space required for UEFI compatibility is only 16KB, so as long as we don't use the slot at offset 0, we're good. Also, the partitioning tools I've tried all put new partitions at an alignment of >= 2048 LBA blocks (512 bytes). This puts the first actual partition at 1MB, which gives us lots of free space at any of the three other offsets. However, why be silly? We use the 128K slot and have plenty of room.
# Zero out partition tables and any pre-existing raw boot images
$ sudo dd if=/dev/zero of=/dev/sda bs=512K count=1

# Write MLO at 128KB offset from start of microSD card /dev/sda
$ sudo dd if=MLO of=/dev/sda bs=128K seek=1
Create a friendly MLO
But ... where did that MLO come from?
Well, MLO is only a cut-down version of U-Boot. This patch applied on top of U-Boot v2014.07 can be used to build an MLO to launch UEFI from. The patch does a few things:
- Adds the platform target am335x_evm_uefi.
- Adds CONFIG_EFI_PARTITION to MLO (referred to SPL in the code).
- Changes the default boot filename to "boot.img" instead of "u-boot.img".
- Uses the FAT filesystem boot mechanism even though we are booting through what is known as RAW mode, which would otherwise look for the kernel at a fixed offset.
# Clone and patch u-boot
$ git clone git://git.denx.de/u-boot.git
$ cd u-boot
$ git checkout -b v2014.07 v2014.07
$ git am 0001-Hack-to-build-MLO-for-UEFI-on-BeagleBoneBlack.patch

# If you're cross compiling...
$ export CROSS_COMPILE=arm-linux-gnueabihf-

# Configure platform
$ make am335x_evm_uefi_config

# Build u-boot (and MLO)
$ make -j4
Create your boot media
Now partition a uSD card in GPT format using, for example, gdisk - making sure the first partition is some kind of FAT. Then write MLO to the card as described above, copy a firmware image (for example the UEFI port underway by Varad) into the FAT partition as boot.img. Insert into BBB, hold down the "user boot" button and power on the board. It should launch the boot image automatically.
When I have some time, I'll put together a method for performing a "raw" boot from the eMMC, to get rid of the need to keep holding that button.
posted at: 13:37 | path: /uefi | permanent link to this entry
07 Aug 2014I'll come in again
Well, I did sort of start writing some blog posts last year, mainly about technical stuff that might be useful to others (and to myself when I forget). But at some point my MovableType installation became a bit ... confused ... and at the same time the company behind MovableType started seriously de-emphasising the opensource version. So I decided to have another look at blosxom, recommended by Steve, which is a very no-frills approach to blogging. I'm liking it, and hope this extremely basic design will mean I actually post more. Hopefully I won't be too lazy to migrate my old posts across, including some unpublished ones.posted at: 13:37 | path: /life | permanent link to this entry
27 Dec 2013SmilePlug - alive at last
So ... sometime last year I ordered a SmilePlug from http://globalscaletechnologies.com/, and it arrived at some point early this year. Hardware-wise, it is a really neat piece of kit that I was intending to put to use as a very configurable home router/firewall; it has 2x1GBE and an ARMv7-A processor + 512MB of RAM. Of course, being Marvell-based, source-code availability and system documentation was a few miles south of sufficient, and unfortunately, it ended up lying in a corner for the greater part of the year. However, the guys at Free-Electrons have managed to get to main parts of the Armada 370 support (including the smileplug's sister-platform 'mirabox') into mainline Linux, so I decided to have another go. Since the U-Boot on the platform is outdated, and sources are not available for me to recompile it with CONFIG_API and be able to use GRUB, it requires the DTB to be appended to the kernel image - and then the whole thing needs to be wrapped as a uImage. I found simple instructions to do that, but include instructions below so I don't need to go looking for it next time : ) Using 3.13-rc5+,$ make mvebu_defconfig # *fiddle* CONFIG_TUN=m $ cp arch/arm/boot/zImage zImage-with-dtb $ cat arch/arm/boot/dts/armada-370-mirabox.dtb >> zImage-with-dtb $ ./scripts/mkuboot.sh -A arm -O linux -T kernel -C none -a 0x00008000 \ -e 0x00008000 -n 'Linux-marvell' -d zImage-with-dtb uImageWhat I haven't managed to do yet is read the kernel off uSD, so for now, I boot it via TFTP.
posted at: 13:37 | path: /linux | permanent link to this entry
01 Jul 2013Booting a full system with Ovmf
QEMU supports exporting a directory structure in the host machine filesystem as a block device containing a FAT filesystem. If you think about it, that's pretty much magic. This is *really* handy for kernel (U)EFI feature testing, since it means I can just throw a Linux kernel (with an EFI stub) into a directory and then be able to boot that from within the UEFI running in QEMU. So, in order to test an x64 Linux kernel with my build of upstream Tianocore UEFI, here is what I do: First, I build a kernel with an EFI stub (to make it directly executable from UEFI).
    $ git clone git://git.kernel.org/pub/scm/linux/kernel/git/torvalds/linux.git
    $ cd linux
    $ make defconfig
    $ make menuconfig
    *** Enable: Processor types and features -> EFI stub support
    $ make -j8 bzImage
Voilà! You now have a kernel image, loadable either as a plain old bzImage, or executable directly from within UEFI. You can copy this image into the EDK2 build output directory, which will make it appear within *fs0:* in the EFI shell. You need to also rename it, giving it a ".efi" file ending, in order for it to be executable by the shell.
$ cp arch/x86/boot/bzImage ../edk2/Build/OvmfX64/DEBUG_GCC46/X64/bzImage.efi
So, if you now launch EDK2 in QEMU and simply call the kernel:
Shell> bzImage.efi
... you should end up with the penguin and a whole bunch of normal kernel boot messages, up until the point where it crashes and burns horribly because you haven't told it where its root filesystem lives (silly!). Fortunately, this is easily done - you just pass paramaters to the kernel as if it were any other command in the EFI shell. However, you of course need to have some filesystem to point it to.
Now, in order to boot to a prompt, I still need a minimum of an initrd - but since I'm doing things like bootloader experiments, I probably want a full filesystem. So I generate a Debian disk image (since my workstation is an x64 Wheezy.
    $ dd if=/dev/zero of=x64-uefitest.img bs=1M count=4096
    $ /sbin/gdisk x64-uefitest.img
    *** Add one partition of type EFI System, and one Linux fs
    $ sudo su
    # /sbin/kpartx -a x64-uefitest.img
    # mkfs.vfat /dev/mapper/loop0p1
    # mkfs.ext4 /dev/mapper/loop0p2
    # mount /dev/mapper/loop0p2 /mnt
    # debootstrap --include=grub-efi,efibootmgr jessie /mnt http://ftp.uk.debian.org/debian/
    # echo "x64-uefitest" > /mnt/etc/hostname
    *** Create fstab (/proc, /sys et. al. handled by udev?)
    # chroot /mnt /usr/bin/passwd
    # cp /etc/apt/sources.list /mnt/etc/apt
    # umount /mnt
    # kpartx -d x64-uefitest.img
    # exit
And then, from your EDK2 directory:
./OvmfPkg/build.sh -a X64 -t GCC46 qemu -hda fat:/work/linaro/uefi/edk2-github/Build/OvmfX64/DEBUG_GCC46/X64 -hdb /work/filesystems/x64-uefitest.img
This sets up your UEFI build output directory as the primary hard drive/filesystem (fs0: in UEFI, /dev/sda1 in Linux) and the image file as the secondary block device (EFI System partition becomes fs1:/sdb1, Linux root partition becomes sdb2). (When you start adding more QEMU parameters to the build/launch script, it strips the default ones - so the -hda ... parameter telling it to set up the virtual FAT partition must be explicitly specified.)
And once at the EFI shell prompt, explicitly change to the correct EFI System partition, since we now have two, and start the kernel:
    Shell> fs0:
    fs0:\> bzImage.efi console=ttyS0 root=/dev/sdb2 ext4
All done!
Update: actually, using efibootmgr (which you may need to install from within the guest with 'apt-get install efibootmgr'), you can make the system auto-boot on subsequent launches by executing:
efibootmgr -c -l \\bzImage.efi -L "EFISTUB" -u "$(cat /proc/cmdline)"
Update again: doh! That auto-booting is only persistent over reboots - not over actually shutting QEMU down.
posted at: 13:37 | path: /uefi | permanent link to this entry
30 Jun 2013Running UEFI virtualised
UEFI is a portable platform firmware standard, although in practice it has up until recently been used only on IA64 and amd64/x64 platforms. The opensource implementation (tianocore edk2) includes support also for ia32 and ARM (aarch32) platforms. I develop for the ARM platform, but I sometimes need to verify my work on other platforms. Since I cannot really keep reflashing my Linux desktop machine every time, I need to use an emulator such as QEMU for testing. This is possible thanks to the awesome feature called OVMF which is included within the Tianocore EDK2 source tree. Inside the OvmfPkg directory inside edk2, there is a build.sh script which umm ... either builds a UEFI image or boots said UEFI image in QEMU, depending on how it is called. It still needs a minor bit of fiddling to make it work, but this takes care of all the actually hard bits. So I'll focus on documenting the "easy" bits (which are only easy if you know them). On my Debian Wheezy installation, which uses gcc-4.7 by default, an edit is required to the toolchain configuration template file:
    diff --git a/BaseTools/Conf/tools_def.template b/BaseTools/Conf/tools_def.template
    index a82404a..5f59a5d 100644
    --- a/BaseTools/Conf/tools_def.template
    +++ b/BaseTools/Conf/tools_def.template
    @@ -2859,7 +2859,7 @@ DEFINE GCC46_ASM_FLAGS               = DEF(GCC45_ASM_FLAGS)

     *_GCC46_X64_ASLCC_FLAGS          = DEF(GCC_ASLCC_FLAGS) -m64
     *_GCC46_X64_ASLDLINK_FLAGS       = DEF(GCC46_IA32_X64_ASLDLINK_FLAGS) -m elf_x86_64
    -*_GCC46_X64_ASM_FLAGS            = DEF(GCC46_ASM_FLAGS) -m64 -melf_x86_64
    +*_GCC46_X64_ASM_FLAGS            = DEF(GCC46_ASM_FLAGS) -m64
     *_GCC46_X64_CC_FLAGS             = DEF(GCC46_X64_CC_FLAGS)
     *_GCC46_X64_DLINK_FLAGS          = DEF(GCC46_X64_DLINK_FLAGS)
     *_GCC46_X64_RC_FLAGS             = DEF(GCC_X64_RC_FLAGS)
Then, to build UEFI with gcc 4.6 or later:
./OvmfPkg/build.sh -a X64 -t GCC46
The script tries to auto-extract toolchain config from the current environment, and ends up most upset since there is no GCC47 toolchain in the build config.
And to launch the generated inage in QEMU:
./OvmfPkg/build.sh -a X64 -t GCC46 qemu
We must specify the toolchain here even though we are not building anything at this point, because the script deduces the path under `./Build` where the generated firmware image can be found, using the toolchain name.
QEMU might complain about some missing ROM files at this point. If you wish, symlink them in from your system's QEMU ROM directory (in my case `/usr/share/qemu`) to the directory where the script places your UEFI ROM (in my case `./Build/OvmfX64/DEBUG_GCC46/X64`). My image ran successfully without any such modifications though.
If you do nothing else, your image should launch, displaying a Tianocore logo, some boot diagnostics, some attempts to boot using various facilities and then falling back to launching an EFI shell since no such facilities were provided by the above configuration.
I will follow up shortly with a post about modifying disk image files and playing around with testing kernels under the resulting system (my original reason for looking into this).
posted at: 13:37 | path: /uefi | permanent link to this entry
